
Indi Home Filter Installation Guide
10 basic steps to follow and in just 10 minutes, you’ll be saving our seas. No plumber or tools required.

A Guide to Your Easy, 10min Self-Install
We have also created some step-by-step video guides to make installation even easier. Find your existing washing machine set up below and follow the instructions.
Your Super Simple Indi Install Videos
Whever you are fitting your Indi filter at home; under the sink, into your stand pipe or on your worktop select the correct video and our step by step instructions will guide you.
You should find all you need in these videos but if you need any more support our customer service crew will be more than happy to help get you ship shape.
How to install Indi:
Groundbreaking Fibre Capture Technology
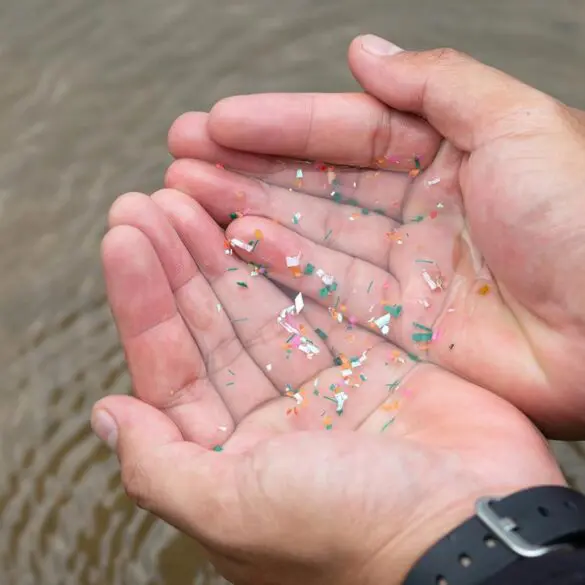
Washing machines dump plastic into the ocean with every wash. How much? 6 grams of microplastics each week on average, which is the same weight as a plastic carrier bag.
With 840 million washing machines being used worldwide, thats 43 billion carrier bags worth of plastic entering our oceans each year. It’s shocking, we know!
Want to Join our Crew of Sea Savers?
Get monthly ocean news, offers, events and updates on our mission.
By clicking subscribe, you agree to our Terms and Conditions.